


Van Conversion Guide
Base Build
Framing the Van Interior
Why Frame Your Van Interior?
Framing helps smooth out the natural curves, ribs, and awkward edges of a van’s interior, giving you clean, consistent lines to work with for lining your walls and ceiling. It sets the stage for a more professional finish and makes mounting cladding or cabinetry far easier down the line.
Even experienced DIYers can struggle with the raw shapes of a commercial van, so taking some time to give yourself an even canvas to work with makes a huge difference.
Materials
9mm Marine Plywood (cut into batons)
Marine plywood is one of the highest-quality sheet materials you can buy for a van build. Unlike cheaper ply, it’s made from higher-grade timber veneers bonded with waterproof glue. This not only makes it stronger and more durable but also far more resistant to moisture – a big win in a camper where condensation and temperature changes are constant.
Its strength means you can use it at just 9 mm thick without compromising rigidity, which helps save headroom and keep weight down. It also bends more easily without cracking, making it ideal for following the curves of smaller vans like the Toyota Hiace. For 2004–2018 Hiace models, 1220 mm wide sheets are a perfect fit for both walls and ceiling panels.

Fixings
Sikaflex or Similar Construction Adhesive
Bonds timber to the van’s metal panels, helps absorb vibration, and reduces rattles. Also adds long-term strength to mechanical fixings.
Sikaflex 11FC is their general use sealant/adhesive and is useful in most cases throughout your van build.
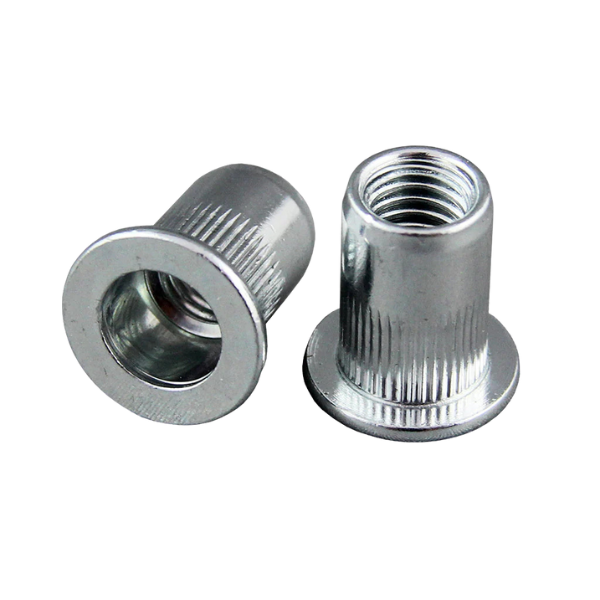
Riv-Nuts or Self-Tapping Metal Screws
Riv-Nuts give a pro-grade finish by allowing you to secure your timber stips with bolts, while self-tappers are quick and simple to install. Both work well when combined with adhesive.
Tools


Additional Tools:
Drill & drill bits
Impact driver
Circular Saw
Riv-Nut gun (if using Riv-Nuts)
Tape measure
Set square
Pencil
Packers (for evening out framing)
Method
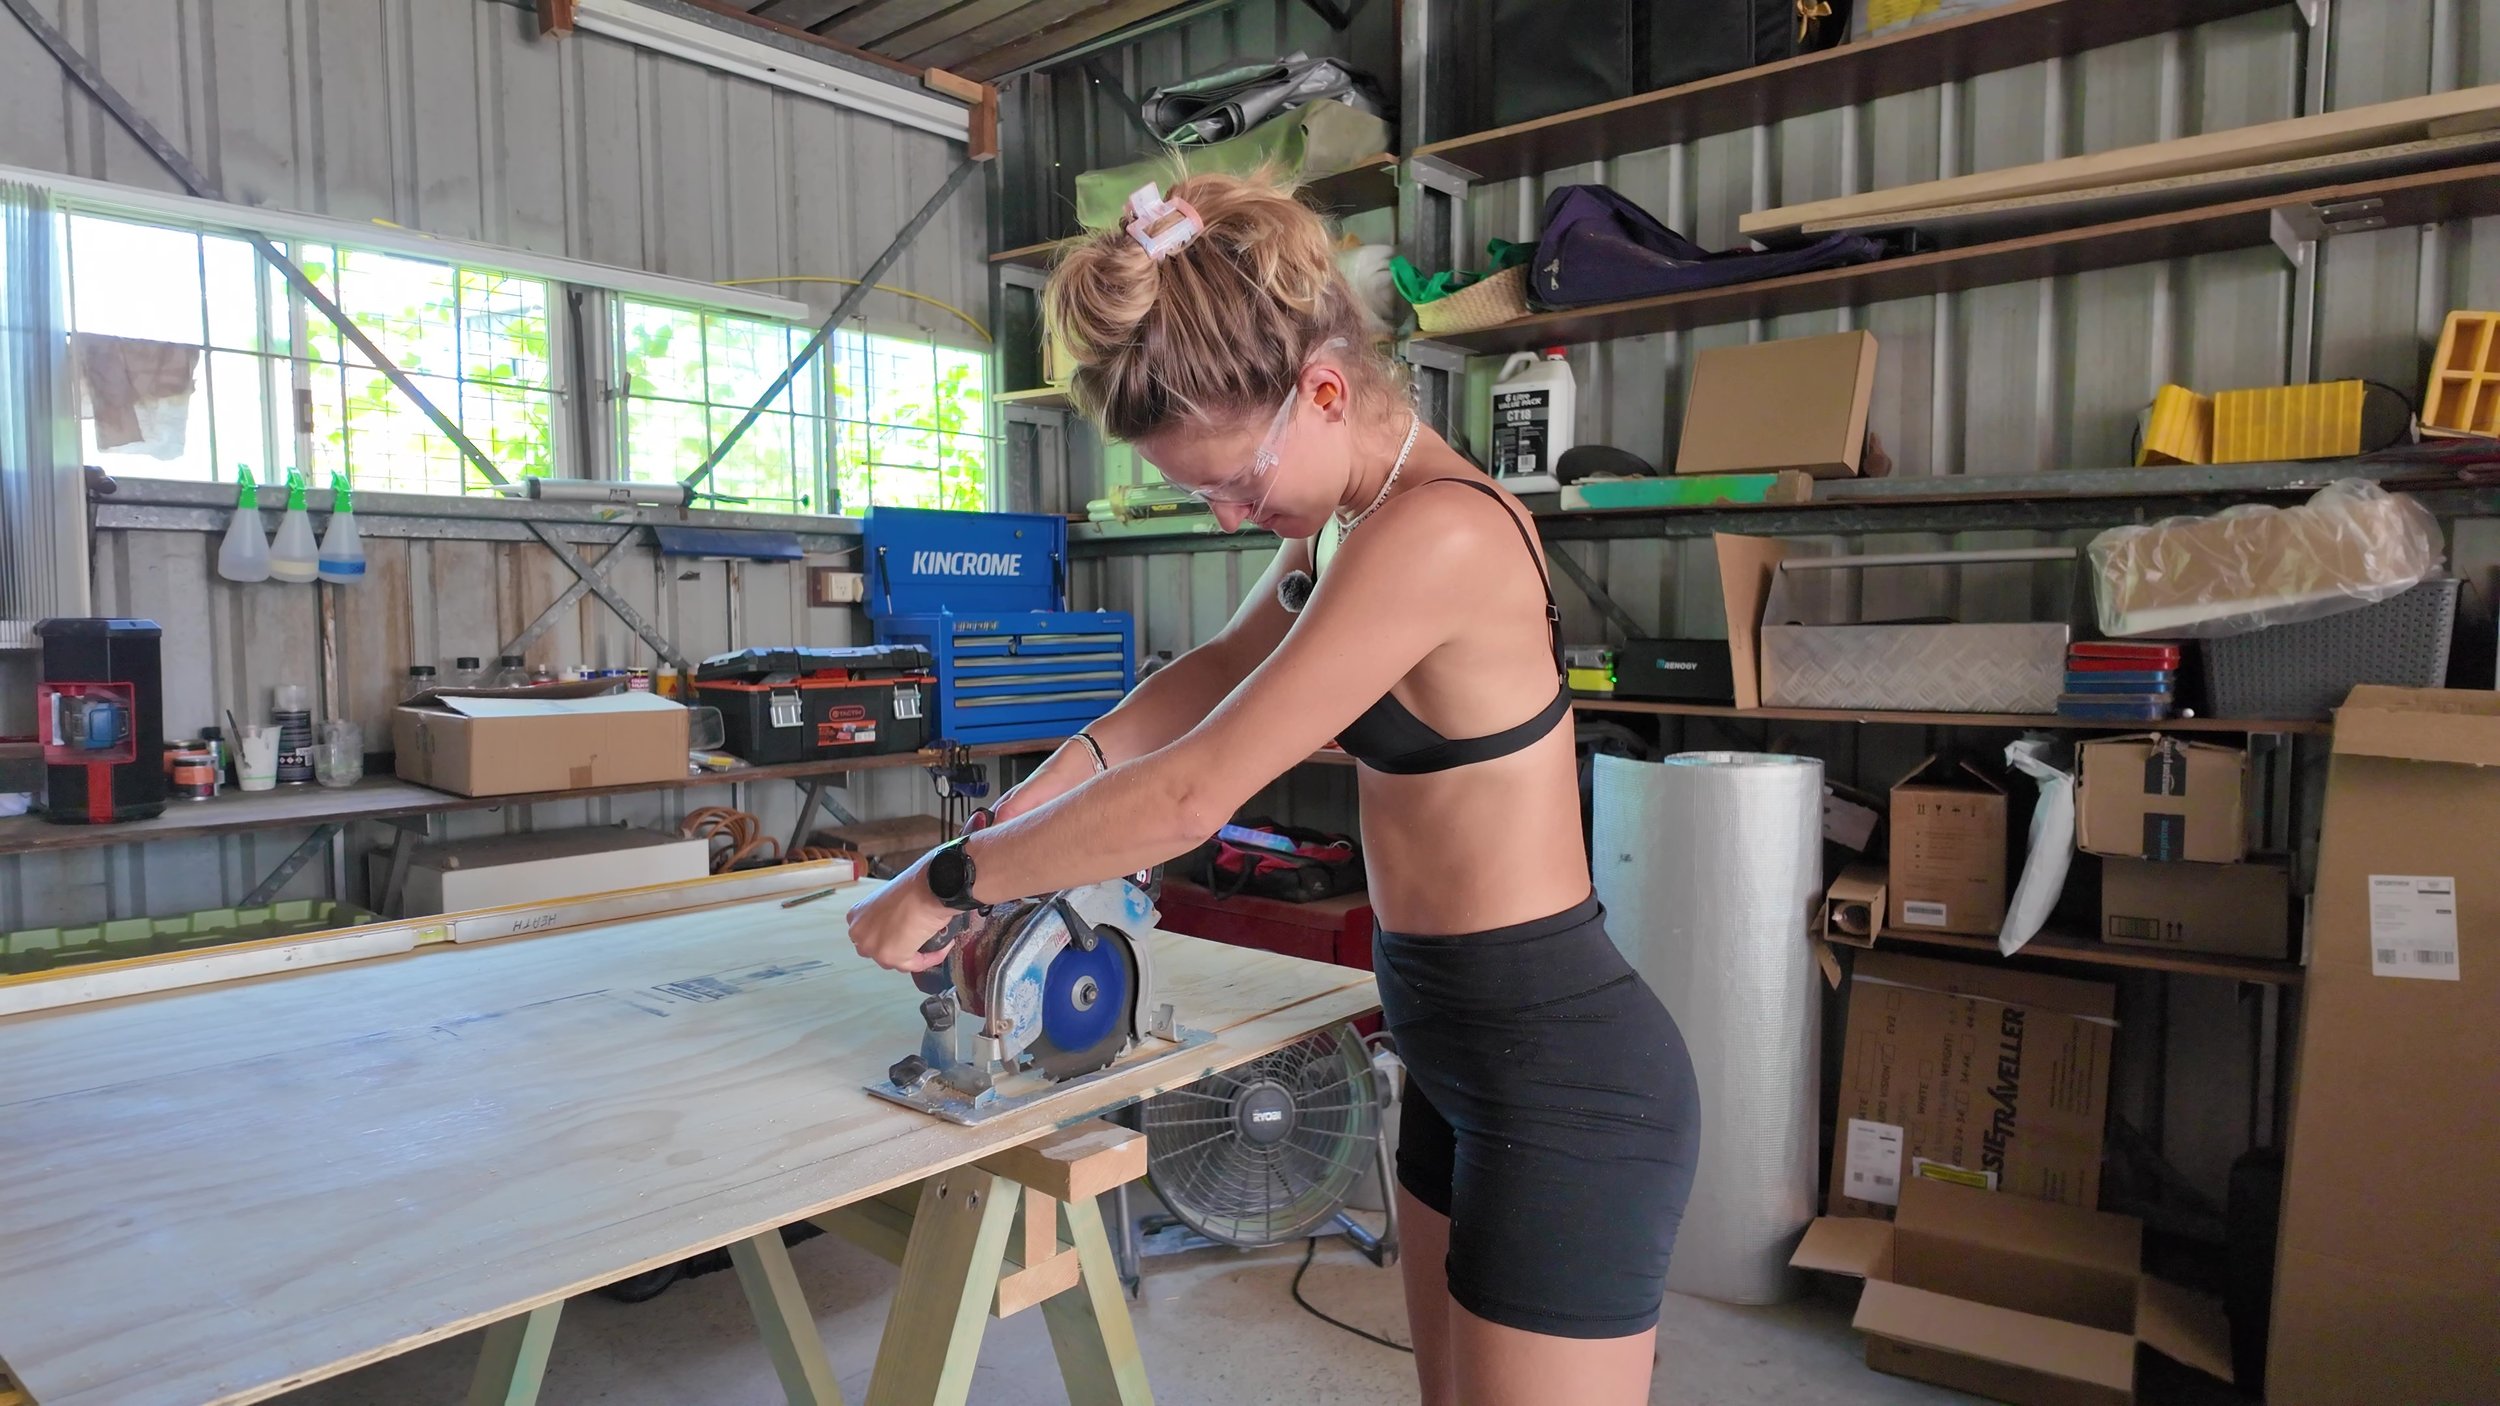
Cut your timber strips
Start with 9 mm marine plywood sheets. For most small vans (like the 2004–2018 Toyota Hiace), these come in a convenient 1220 mm width, which works perfectly for both walls and ceiling. Cut your sheets into strips about 100 mm wide. If you’re confident with placement, you can go narrower (around 80 mm) to save weight and space.
Plan your strip placement
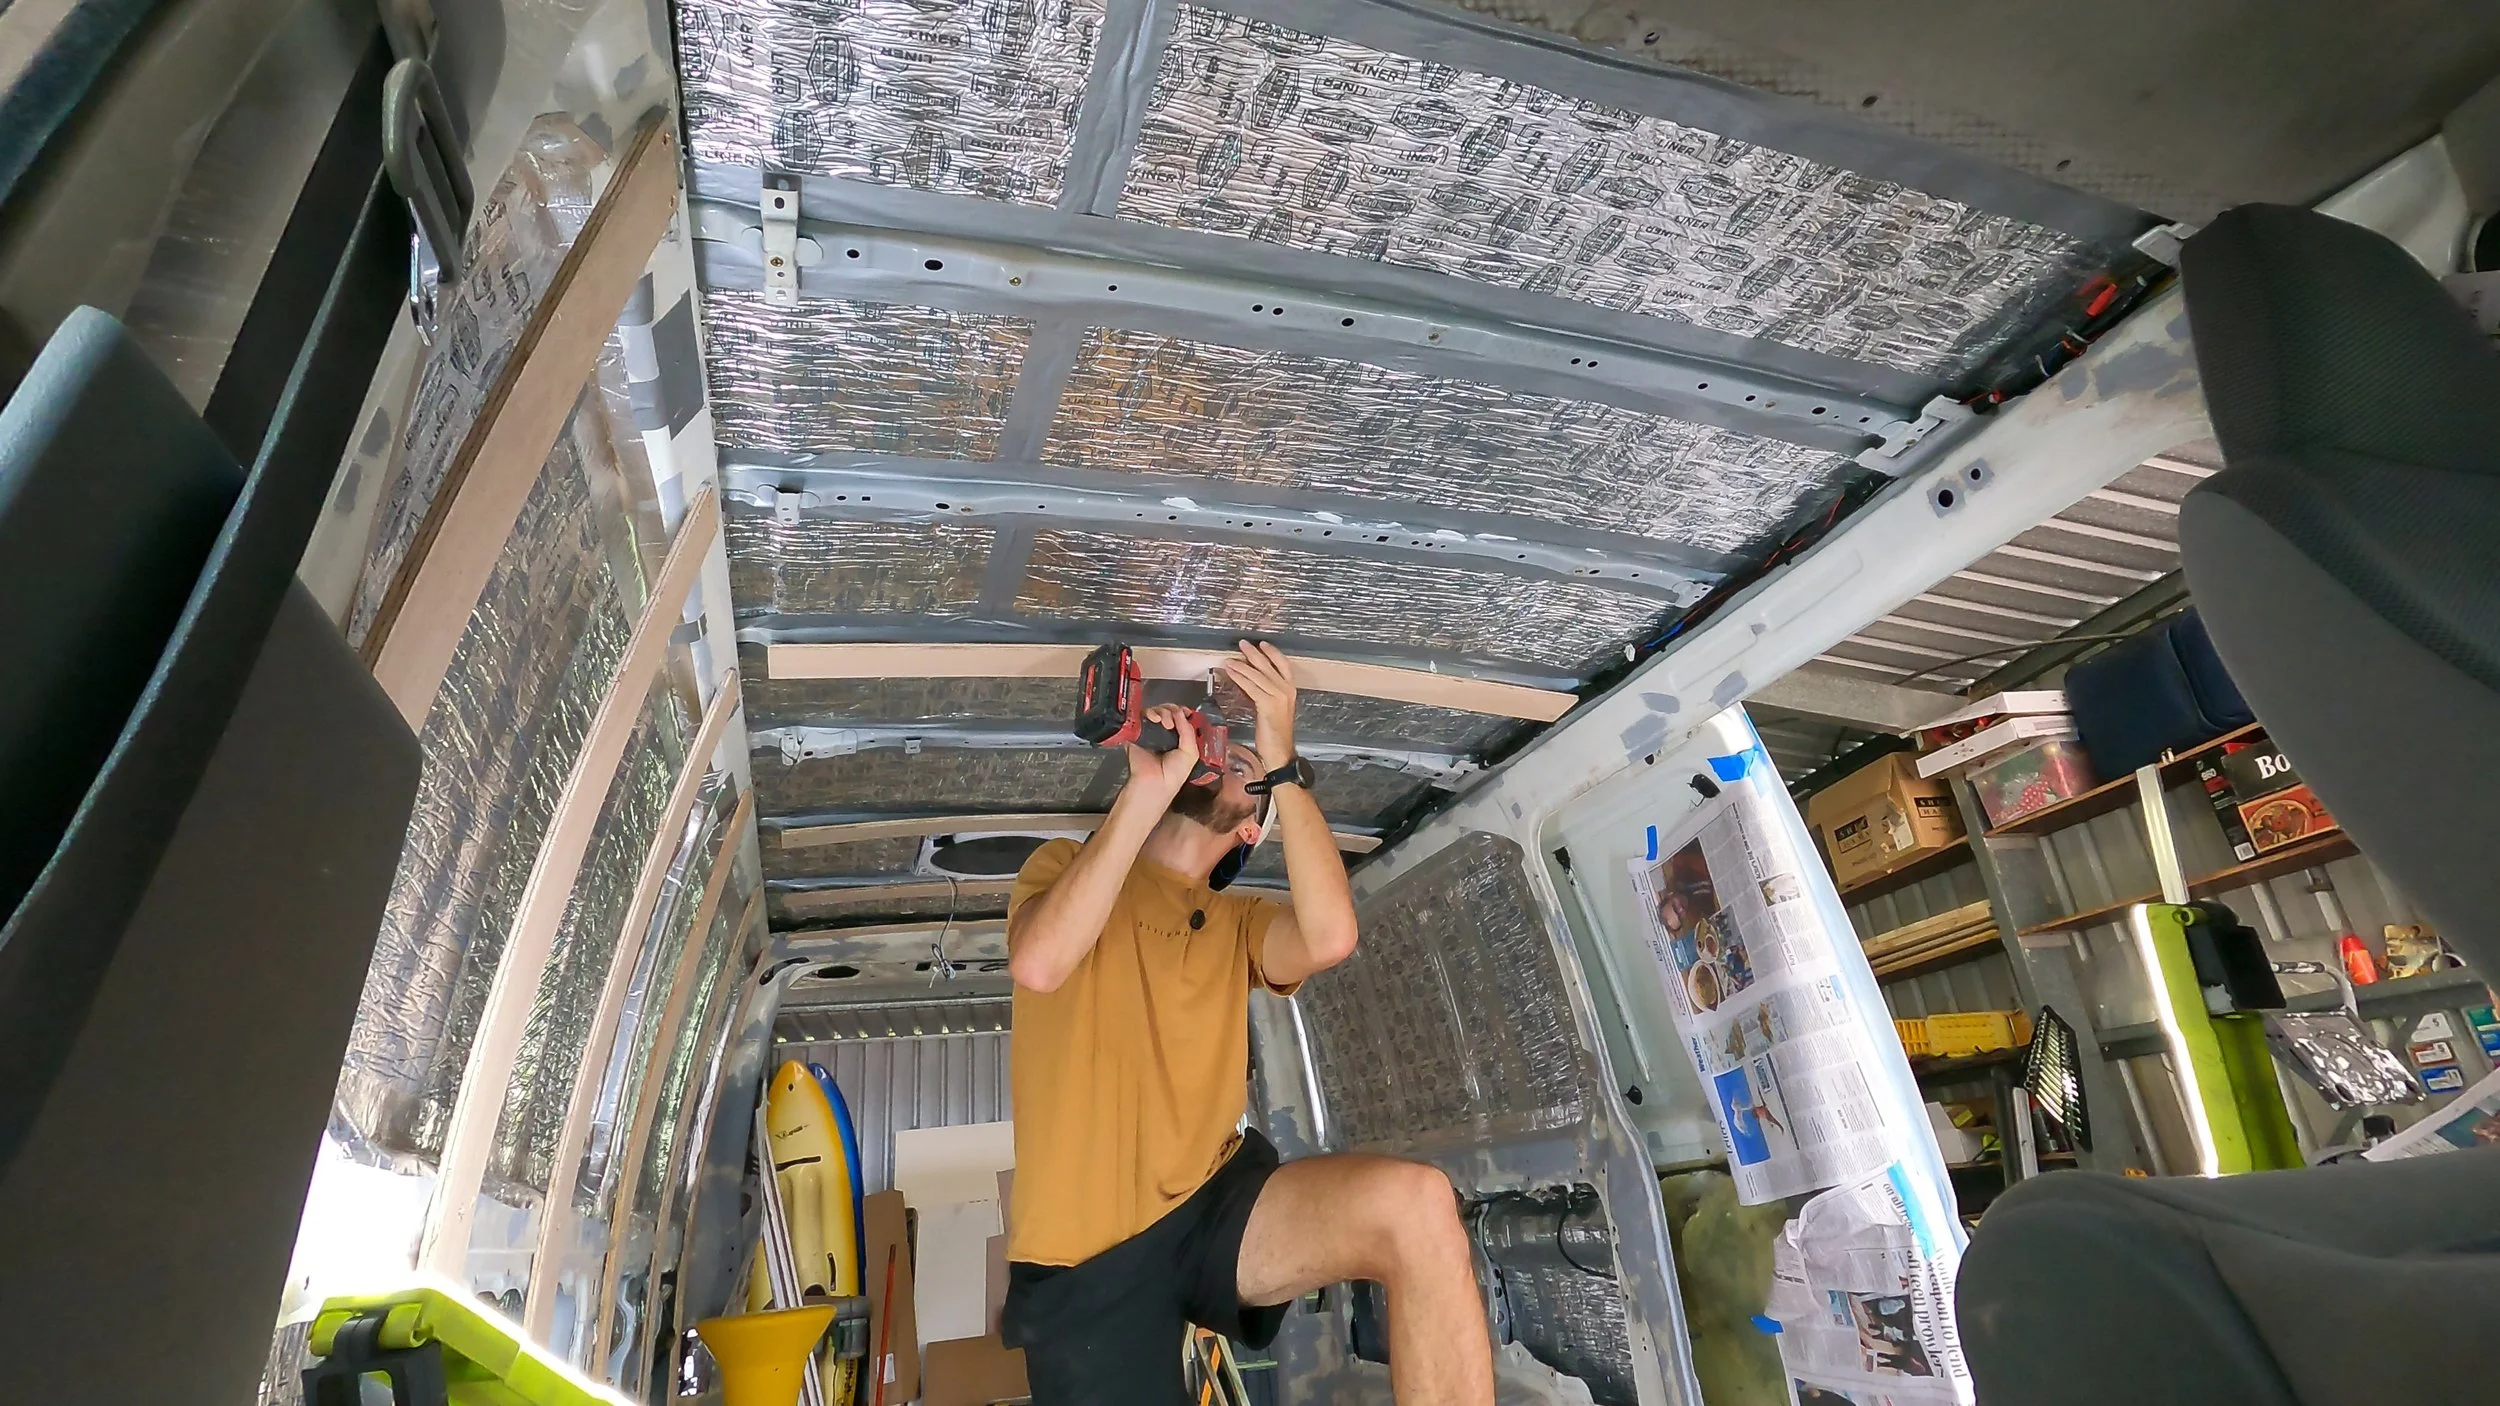
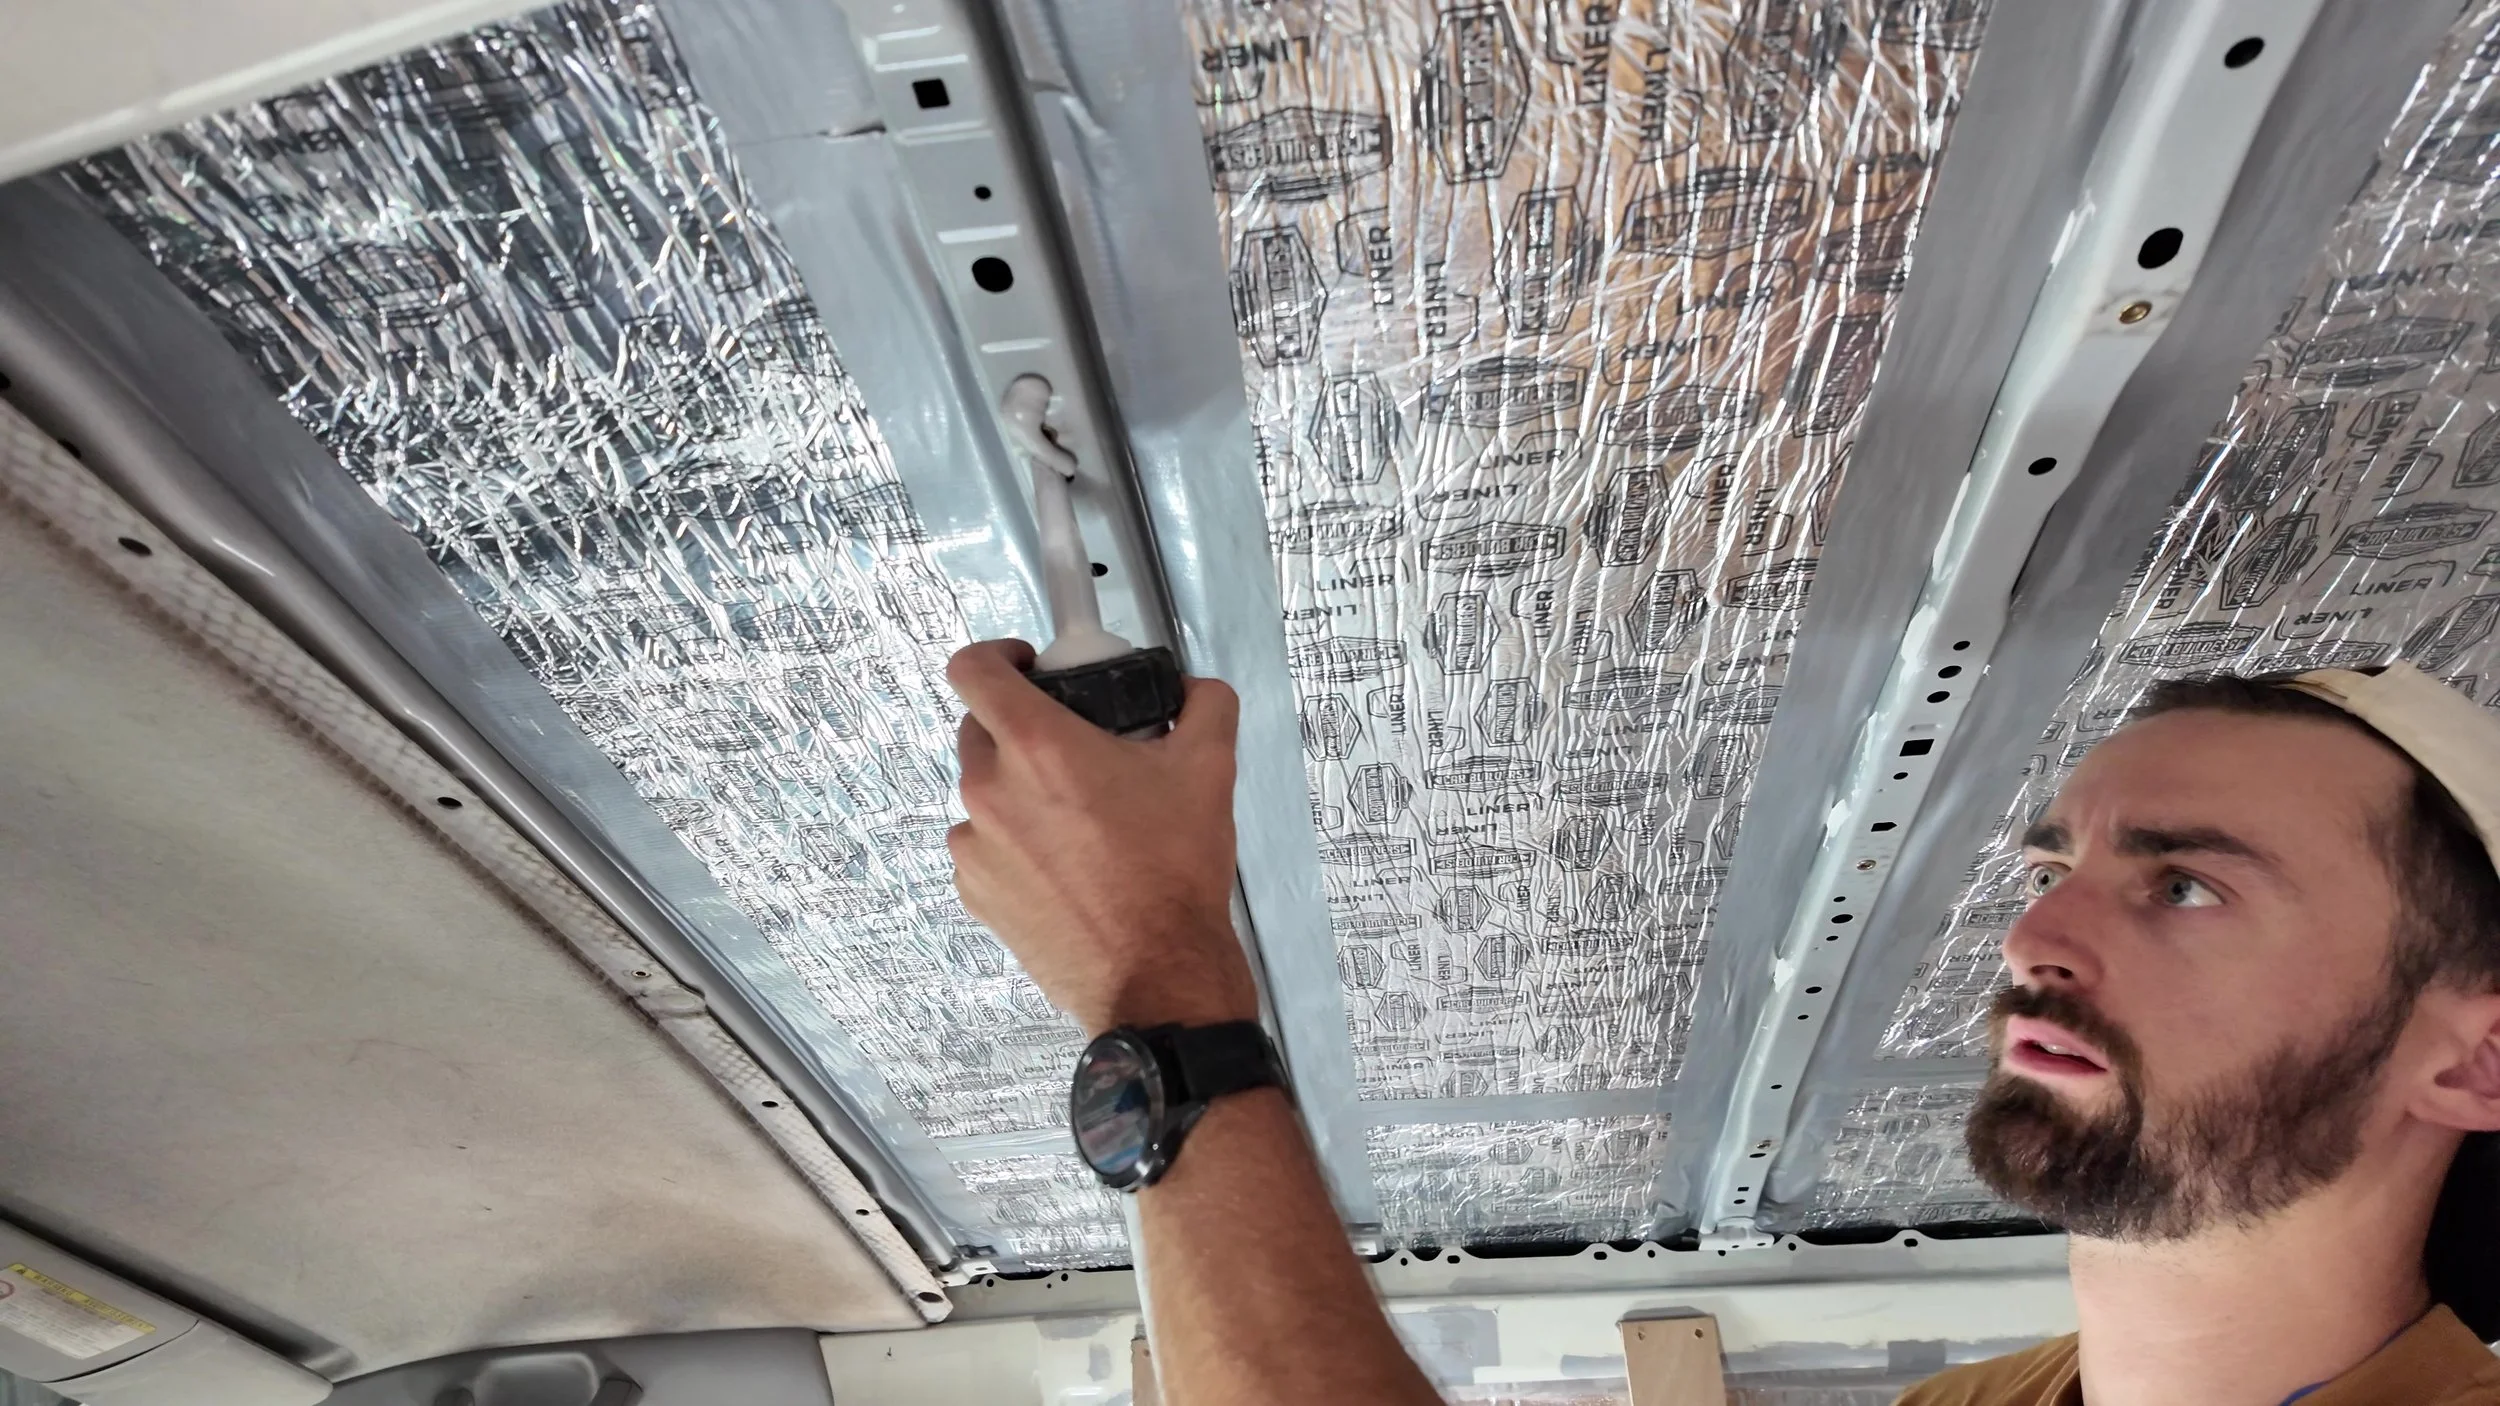
For the walls, use at least 5 vertical strips evenly spaced along each side, keeping gaps under 500 mm. For the ceiling, plan for at least 6 horizontal strips placed on the structural supports runnings across the ceiling. These metal ribs give you something solid to fix to and also create the perfect alignment to make your strips sit consisstently down the length of the van.
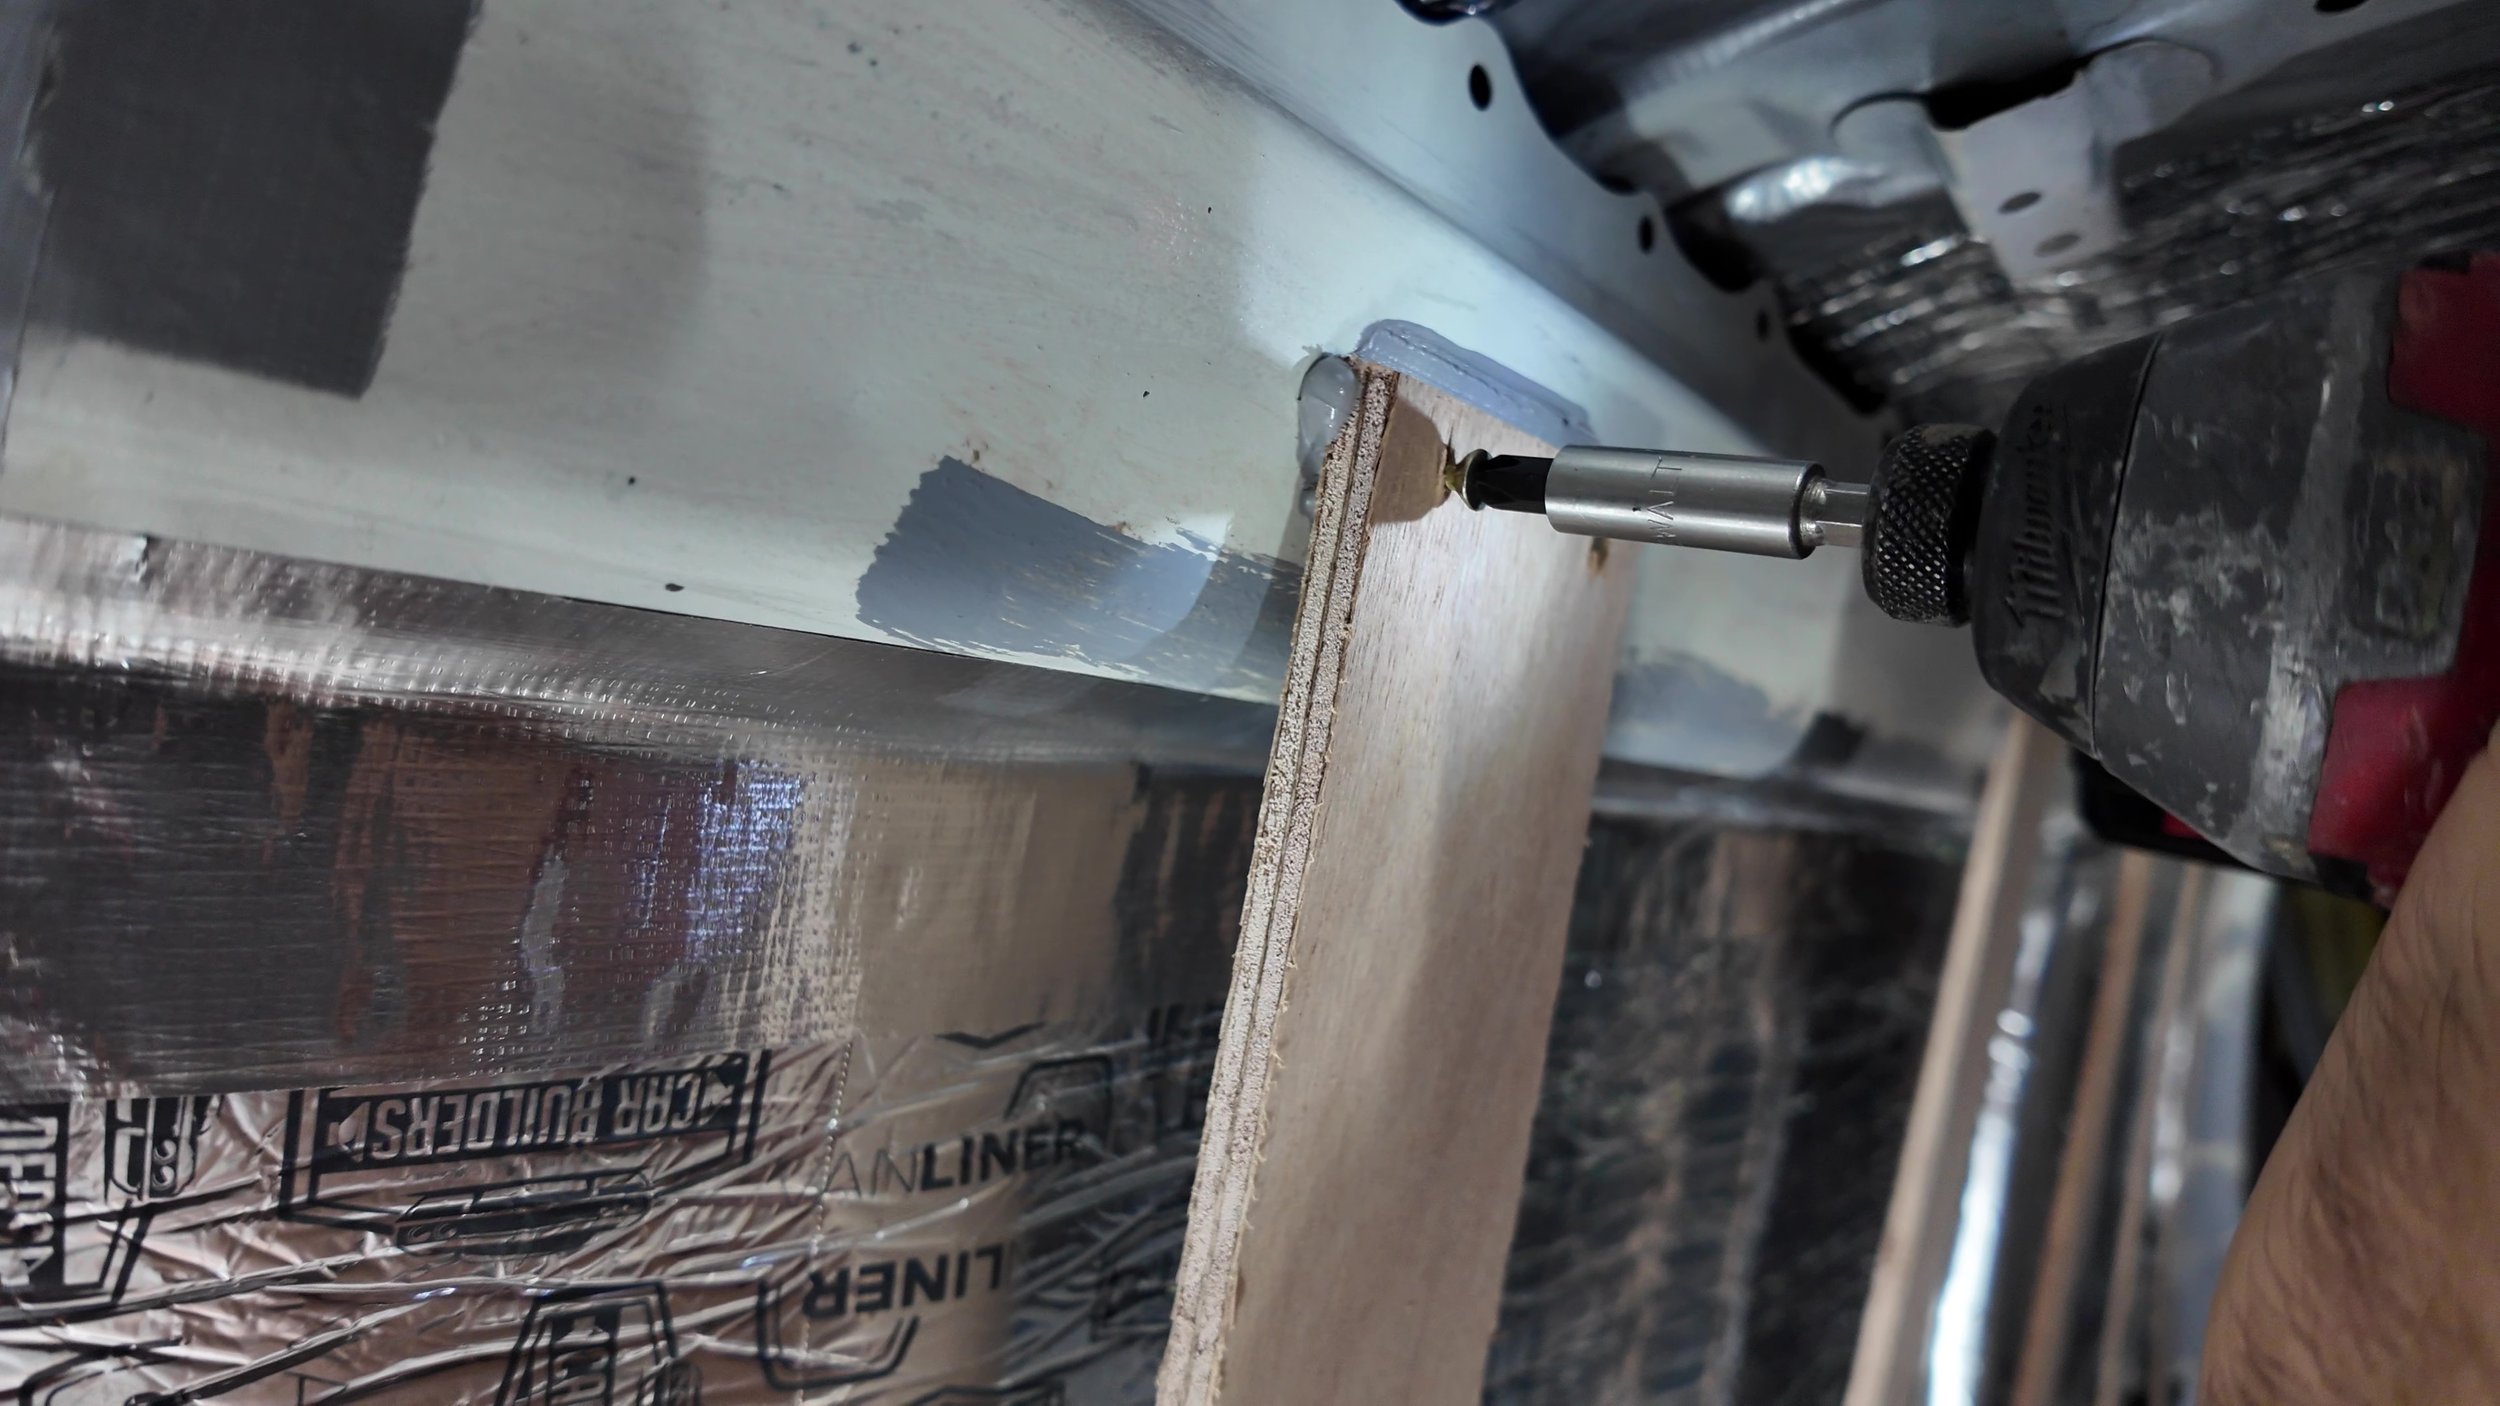
Mark and prepare fixing points
A full-length strip should have a minimum of three secure fixing points on the walls: top, middle, and bottom. Sit the bottom strip on 20 mm of packers to maintain a consistent starting height along the van and the ensure that the strip reaches the top beam of the van. On the ceiling, fix each strip at 5 points for added strength.
Apply adhesive
Before securing each strip, apply a bead of Sikaflex (or similar polyurethane adhesive) anywhere timber will contact metal. This adds strength, reduces vibration, and helps prevent squeaks later. (Don’t skip this step)
Secure the strips
You’ve got two main options:
Self-tapping metal screws - Quick and simple. Use two screws per fixing point.
-
On the walls, start by sitting the strip in a 20mm packer and fixing the bottom point. Then gently push the strip into the curve and fix the middle, then the top. Each point should have 2 screws to eliminate vibration or any wobbling. For the ceiling, start at the center and work outward to both sides, using the ribs as your fixing guides.
Rivnuts and bolts - A more professional finish and stronger hold. Drill your holes, install the rivnut, and secure with bolts. Always apply Loctite or Sikaflex on threads to prevent loosening over time.
-
If using Riv-nuts my prefered method is to fix the center of the strip first with a bolt into the riv-nut. This pulls the timber into the curve of the van and holds it in place while screwing the remaining points of contact. In this case - it’s best to place your timber strip in position on the 20mm packer, and push it in to the curve of the wall where it will sit, then create a pilot hole with a small drill bit through the center point of the timber. Use that pilot hole to drill a bigger hole and install a threaded rivet in the van will. This ensures that that hole in your timber aligns with the threaded rivet without the need for tricky measurments.
Don’t forget adhesive!
Watch my video walkthrough on how to frame your van on YouTube.

Use marine ply for strength and bend
Marine-grade ply resists water damage, holds screws better, and can bend to follow the van’s curves without snapping — a huge advantage for clean, consistent framing.
Double-check alignment
Consistency is key - every strip should be straight, evenly spaced, and at the same height. Use packers where necessary to maintain an even surface for cladding later.
Always combine adhesive with fixings
Screws or bolts alone can loosen over time due to vibration. A bead of Sikaflex between timber and metal creates a quieter, more durable structure.
Mark cabinet and fixture locations
Before fixing any strips, mark where heavy items will go so you can reinforce those areas with wider or extra framing.