


Van Conversion Guide
Base Build
Cable Rough-In
Running your electrical cables is one of those steps you only want to do once - and do properly.
With your framing finished, now’s the perfect time to run every wire throughout the van to where they need to go before the walls go up. This is a true “set-and-forget” stage of the build, and getting it right now means you won’t have to pull panels off later to add something you missed. We do this after framing so cables can be neatly routed through or alongside your wall structure without the risk of damage while installing your timber framing for your walls.
Note:
This step is addressing the rough-in of cables throughout your van. For more information on 12v systems and help sizing your own -
Check out the Planning Your 12V Electrical System section of Part 1 of this guide.
It covers:
Sizing your system
understanding your components
Wire sizes
Power draw
Appliance suggestions
Example power usage chart
Materials and Tools
Cables
The backbone of your electrical system. Marine and Automotive grade cables are a must in van conversions so be cautious when buying any cables online. Personally I buy my cables in person from my local Jaycar store to be sure of their quality. Choose the correct gauge for each circuit based on your appliance’s current draw and the length of the run. Find the correct gauge cable to use in your van using a Cable Size Chart like this one from Enerdrive.
Electrical Tape
Used to insulate and bundle wires, protect exposed conductors, and secure temporary joins during installation. High-quality tape also helps keep labels in place on your cables.
Snips
Handy for cleanly cutting electrical cable to length. A good pair will slice through insulation and copper without fraying the ends, making it easier to crimp or terminate.
Cable Ties
Keeps your wiring neat and secure by bundling multiple cables together. This reduces movement and wear over time, especially in areas where the van will be subject to vibration.
Tie Down Tabs (Stick-On)
Adhesive-backed mounts that work with cable ties to secure wiring to walls, framing, or other flat surfaces. Great for keeping cable runs tight to the van body and out of the way.

Make sure you buy the correct cable size for the job
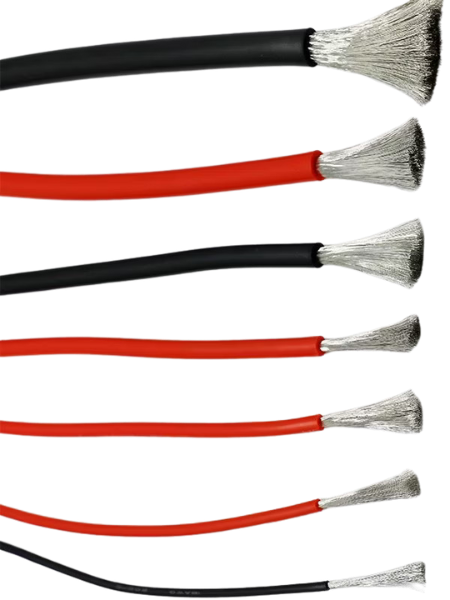
Only use marine or auto-grade copper (or tinned copper) cable. These are made from highly conductive copper and use dozens—sometimes hundreds—of fine strands instead of a single solid core. This design improves flexibility and makes the cable far more resistant to damage from movement and vibration.
How to size cables for rough in
I am not a licensed electrician. All information in this guide is general advice only. If you are unsure about your system, speak to a licensed professional.
Before you run cables throughout your van, you need to know the correct gauge (thickness) each cable must be to safely carry the current required by the appliance it’s powering. This is the same process you’ll use when sizing cables for your 12V electrical board.
Generally, the cables used to run from your 12V board to individual appliances will be smaller in gauge than the main cables at the board itself. That’s because most appliances draw much less current than the combined total handled at the fuse box. For many van builds, 1.5 mm² or 2.5 mm² cable will be sufficient for lighting, fans, and small accessories - but you should still size every cable properly to be sure it’s safe.
The Cable Sizing Process
Find the current draw
Check the appliance’s manual or label to see how many amps (A) it draws.Measure the cable run length
This is the total length from the fuse box to the appliance and back again (positive and negative combined).Check a cable size chart
Using a reliable 12V cable size chart, find the minimum gauge that can safely carry that amount of current over the total run length.Repeat for every appliance
Do this for each circuit - different appliances will have different cable requirements.
Tip: Always use marine-grade tinned copper cable for van builds. It’s more corrosion-resistant, flexible, and built to withstand the vibration and moisture common in mobile setups.
Why Oversizing is Safer
It’s impossible to make a cable “too thick” for a 12V system. While undersized cables can overheat and cause a fire, a larger gauge than necessary has no downside other than slightly higher cost and weight. In fact, using thicker cable can improve system efficiency by reducing voltage drop over long runs.

Method
Method
Plan your system before running cables
Map out all your 12V appliances and their locations, including anything you might want to add in the future. This is the time to think ahead – you don’t want to pull your walls back off just to add another USB port later.
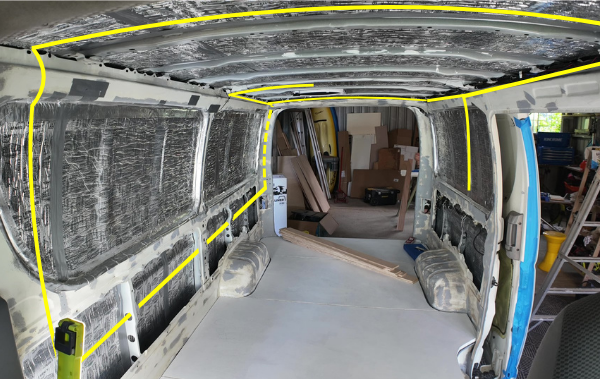
Use proper routing and protection
Run cables through factory grommets or along factory pillars where possible. If you need to drill new holes, always deburr sharp edges, add rubber grommets, and use split tubing for long runs. Keep your cable bundles neat with zip ties, and avoid tight bends, pinch points, or any tension on the wires.
Run both positive and negative wires
Even though your van’s chassis can act as ground, it’s better practice to run both positive (+) and negative (-) wires back to your fuse box. This makes the system simpler, safer, and more reliable in the long term.
Label as you go
Label cables 10 cm from each end using tape or permanent marker, clearly noting both the source and destination (e.g. "Fuse Box to Fridge +"). This will save you a huge amount of time and guesswork when connecting everything later. Leave 10–15 cm of slack at both ends to make installation easier.
Allow for future upgrades
If you think you might add something later, now’s the time to run extra cables to those spots. It’s cheap insurance and far easier than adding them after your walls are finished.
Common mistake: Forgetting to label both ends of a cable. Without labels, you’ll waste hours trying to trace wires once the walls are up.


Example of common paths used to rough in cables.
Common Appliances to rough in for:
(Some of these links are affiliate links and will earn Journey Van Builds a commission at no cost to you if you make a purchase)
| Appliance | Image | Why Rough This In? | Max Draw (A)* |
|---|---|---|---|
| LED Lights |  |
Primary lighting source - usually installed in ceiling or cabinetry. Very easy to wire now, difficult later. | 0.2–0.5A per light |
| LED Strip Lights | 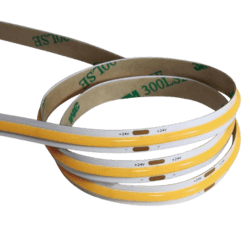 |
Great for ambient or under-cabinet lighting. Adds atmosphere and improves nighttime visibility. | 1A (per meter) |
| USB Outlets |  |
For charging phones, tablets, and devices. Commonly installed near beds and kitchen benches. | 3-4A (per port) |
| Roof Fan |  |
Essential for ventilation. Rough wires to the roof before cladding is installed. | 2.5A (max) |
| Sirocco Fan |  |
Quiet wall-mounted fan for bedrooms and kitchens. Needs wiring routed before walls go up. | 0.3–1A |
| Fridge | 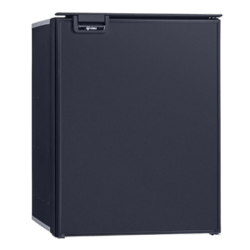 |
Runs 24/7. Always rough in a dedicated cable directly from your fuse box to the fridge cabinet. | 4–6A (when compressor runs) |
| 12V Water Pump |  |
Used for sinks and water systems. Needs wiring routed to your kitchen or water cabinet. | 4.5A |
| Battery Monitor |  |
Mounted somewhere visible. Helps track battery levels and system health. | 0.05A |
| 240V Outlet (via inverter) |  |
If running an inverter, rough-in an extension lead to your preferred outlet location. Always consult an electrician. | Varies based on appliance load |
Use marine-grade, multi-strand copper wire
This type of cable is designed for vibration-prone environments like vans and boats. It’s far more flexible than solid-core wire and resists internal breaks over time.
When in doubt, oversize your cables
Going thicker than required won’t cause any issues and can actually reduce voltage drop. Undersized cables, on the other hand, can overheat and cause fires.
Label both ends of every wire
Include both the source and destination. Without this, tracing cables later will be frustrating and time-consuming.
Protect every pass-through
Any time a wire goes through metal, use a grommet or split tubing to prevent rubbing and future shorts.