


Van Conversion Guide
Base Build
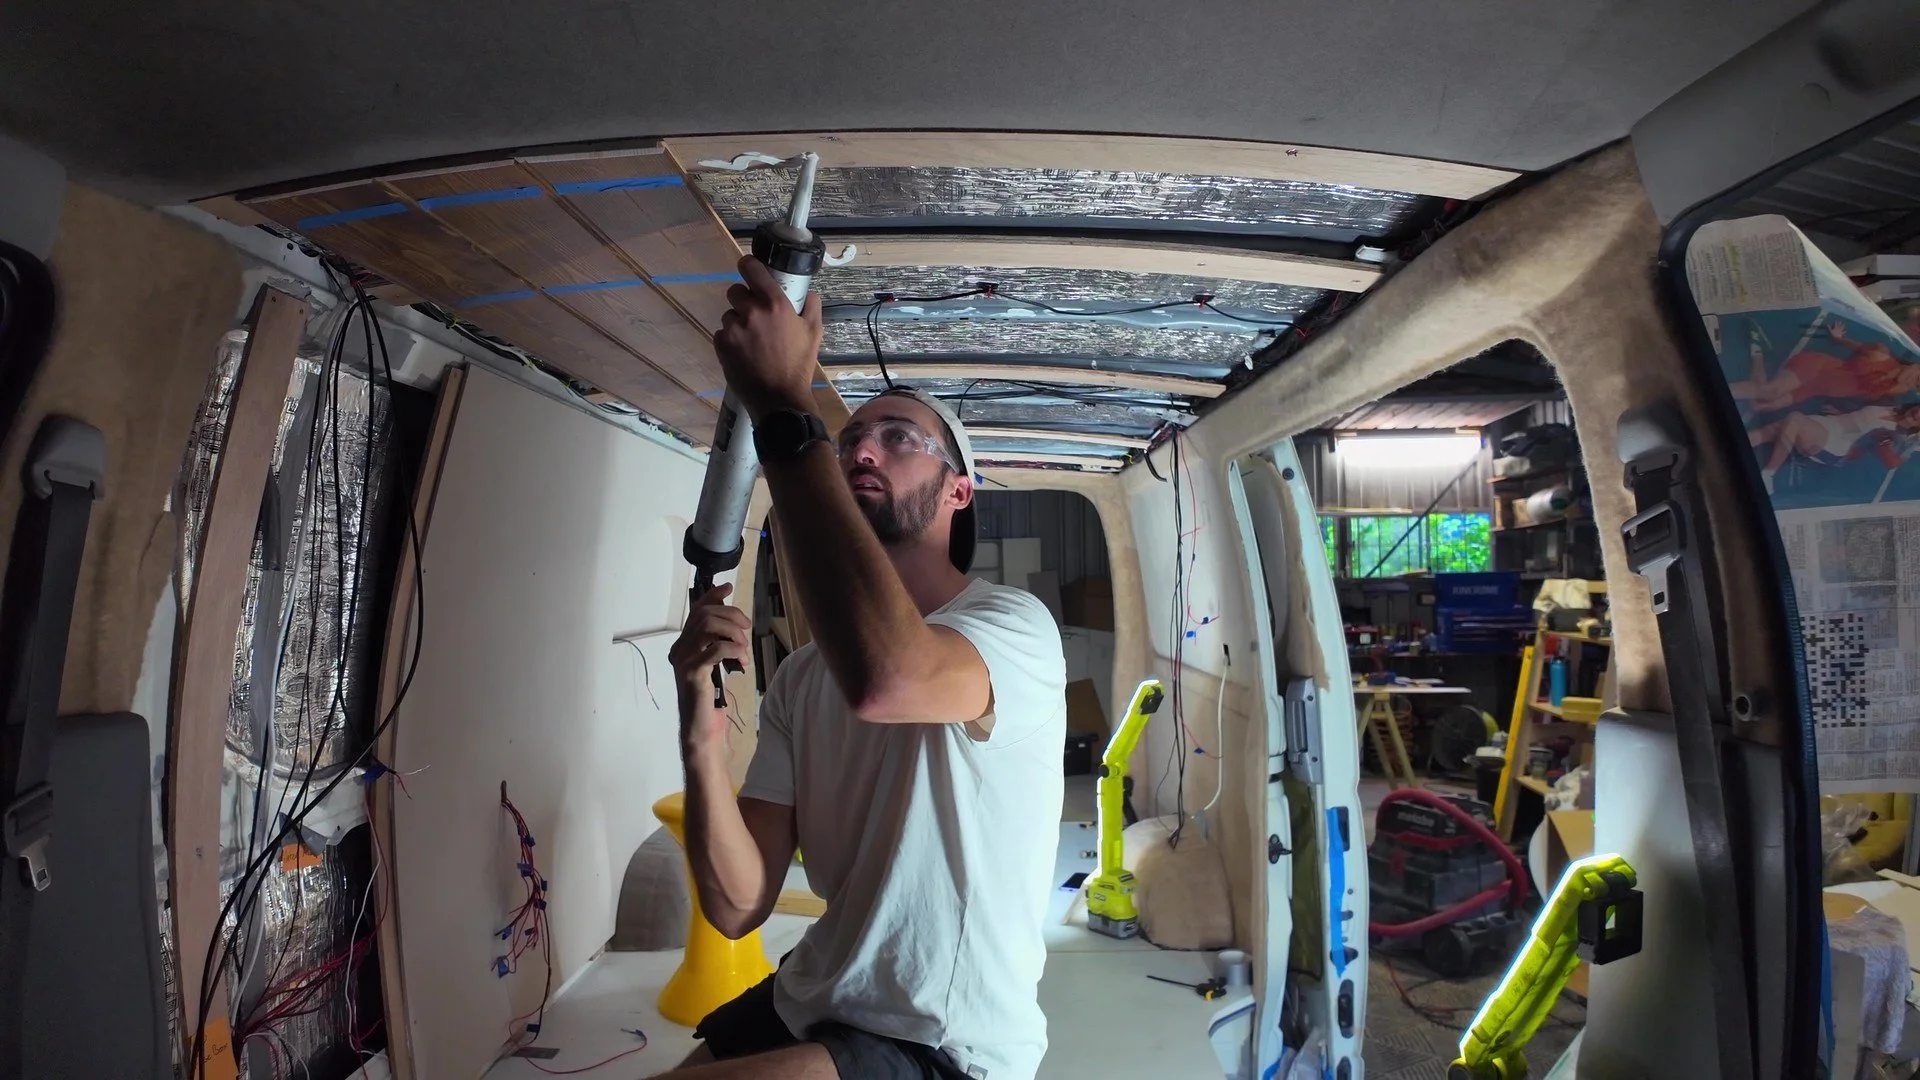
Installing Tongue and Groove Ceiling Panels
With your walls up, it’s time to tackle the ceiling — and this is where your van really starts to feel like a home. Installing tongue-and-groove pine lining boards overhead adds a warm, cabin-like vibe that totally transforms the space from a commercial shell into something you’ll actually want to live in.
This part is especially satisfying because the whole interior starts to come together — but it also requires a bit of patience (and neck strength!) as you work overhead. Before you start, make sure your wall panels are already in. This allows you to run your ceiling boards into the walls for a cleaner, gap-free finish.

Materials and Tools
Tongue-and-Groove - “Pine Lining” Boards
Classic lining boards that slot together seamlessly to form a tidy ceiling. Their interlocking design makes installation easy while still allowing for the slight curve often found in van roofs. These pine boards help any van feel like a cosy cabin, especially if you use a stain and varnish to bring out the natural grain of the wood.
Stain or Timber Paint
Your ceiling colour will heavily influence the feel of your van. I like a stained timber look to balance out white walls, and give a cosy feel, but lighter colours also help open up the space visually. Whichever way you go, use a durable finish to protect the timber from steam, condensation, and grime.
Wood Glue
A bead of wood glue between each tongue-and-groove joint helps seal the ceiling panels against moisture. This is important in vans due to cooking and overnight condensation.
Sikaflex or Construction Adhesive
Used alongside screws to bond the ceiling boards to the timber battens. An adhesive helps eliminate movement, rattling, and squeaks caused by road vibrations.


Tip - A light interior makes the space feel larger which can make a huge differece in a tight space like a campervan, while natural timber tones give a rich, cosy aesthetic. A combination of raw timber grains and tones of white is a great starting place for any van conversion.

Additional Tools:
Drill + Drill bits
Impact driver + timber screws
or
Nailgun/Hammer (If using nails)
Jigsaw
Jigsaw blades
Dropsaw/Circular saw
Sanding block
Tape measure
Pencil
Paintbrush or roller
Method
Make sure your walls are done first
Run your wall panels up high enough that the ceiling boards can run flush into them. This avoids awkward trim to cover joins and makes for a cleaner edge.
Pre-finish your ceiling boards
Paint or stain all boards (front and back) before installation. This protects them from moisture and saves time (and your neck) once they’re installed.
Note: Don’t cover the tongue or the grooves of the baords or they won’t fit together.Prepare alignment
Measure out where each baard will sit so you know the correct position to start on one side of the van to work across with the correct alignment. It’s important to have your two cuts on either side of the van nice and large to absorb any slight curvature down the length of the van. (planing for a join directly at the center of the van achieves this perfectly in a Hiace.)Measure and cut each board
Start from one side of the van and cut each board to fit the length. Measure both sides of the board and cut to match the slight contour of the rear door. It’s worth getting some help to hold the tape measure for this.Install wiring as you go
Run all light, fan, or solar wiring before installing any boards. Cut holes as needed during install - it’s much harder (and messier) to cut holes and retrofit later.Fix boards with glue and screws
Apply Sikaflex or similar adhesive along the batons and press the board into place. Then secure with timber screws or nails into each timber batten.Continue board by board
Slot each new board into the previous one and repeat: measure, cut, glue, screw. Take your time around curves and light fittings.Finish with clean edge cuts
Trim the final boards along both side walls to fit neatly against the walls and rear door. Smooth cuts sanded down slightly at a 45 degree angle at the ends gives the whole ceiling a polished look.
Common mistake: Installing the ceiling before the walls. This often results in exposed gaps where the wall panel doesn't reach high enough to meet the ceiling.


Use wood glue in the joins
Adding a bead of wood glue to each tongue-and-groove joint helps seal out moisture — ideal for areas above cooktops or beds.
Cut for lights as you go
It’s much easier to cut clean openings for lights or fans during installation than trying to drill through the ceiling later.
Properly recess fixings
When fixing boards make sure nails or screws are sitting just under the surface of the timber to allow for easy coverage with timber putty later.
Treat both sides of every board
Sealing the back side of your timber helps prevent warping and improves moisture protection — don’t skip it!