


Van Conversion Guide
Base Build
Cable Rough-In
🛠️ Step 2: Route and Protect Your Cables
Use factory grommets or pillars where possible
If drilling new holes:
Deburr sharp edges
Add rubber grommets
Use split tubing for long runs
Keep bundles clean and tight with zip ties
Avoid tension, bends, or pinch points
Run All Your Wires Before the Walls Go Up
Now that your framing is in, it's the perfect time to run all your electrical cables. This is one of the most important “set-and-forget” steps of your build—get it right now and you won’t need to rip apart your walls later.
We do this after framing to avoid damaging wires during timber install, and so you can neatly route cables through or alongside your wall structure.
IMPORTANT: If you feel a bit lost or out of your depth here, refer back to the Planning Your 12V Electrical System Section of part 1 in this guide. There you’ll get a solid understading of your electrical system by learning how to size your 12V system and about some components commonly found in campervan electrical systems.
📋 Step 1: Plan Before You Wire
Before touching a cable, get clear on:
What 12V appliances you’re running
Their locations in the van
What you might add later
You won’t want to re-open your walls to add a USB port.
🧠 Not sure what to install yet?
👉 Check out the Planning Your 12V Electrical System section for:
Wire sizes
Power draw
Appliance suggestions
Example power usage chart

Example of common paths used to rough in cables.
❌ Don’t forget to run your negative wire.
Even though the van’s chassis can technically act as ground, it’s best practice to run both positive (+) and negative (-) wires from the fuse box. This ensures safety, simplicity, and system stability.
Diagram or photo (wires through van ribs)
⚡ Step 4: Common Appliances to Rough-In
Rough these in now—even if you're not installing them yet:
| Appliance | Image | Why Rough This In? |
|---|---|---|
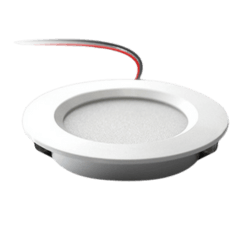
| LED Lights |
|
Primary lighting source—usually mounted in ceiling or cabinetry. Easy to wire now, hard to add later. |
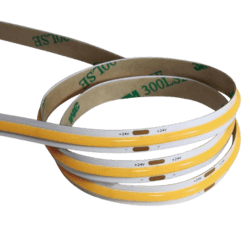
| LED Strip Lights |
|
Great for ambient or under-cabinet lighting. Add character to your van and improve nighttime visibility. |
| USB Outlets | 
| For charging phones, tablets, and other gear. Install near bed and kitchen areas. |
| Roof Fan |

| Essential for ventilation. Run power to the center ceiling where it will be installed. |
| Sirocco Fan | 
| Popular wall-mounted fan for airflow while sleeping or cooking. Requires flexible routing. |
| Fridge | 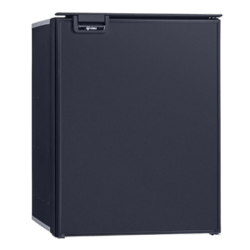
| Always-on appliance. Needs dedicated wire from fuse block to fridge cabinet location. |
| 12V Water Pump | 
| Mounted near your water tank. Route wiring to sink or water cabinet. |
| Battery Monitor | 
| Mounted on a wall for visibility. Helps monitor charge, usage, and system health. |
| 240V Outlet (via inverter) | 
| If installing an inverter, consider roughing in an extension lead to where your outlet will be (speak to your electrician). |
✅ Takeaways
Cable rough-in is the foundation of a smooth electrical install. Label clearly, plan ahead, and don’t skip routing extras for future upgrades.
👉 Need help calculating cable sizes or power draw? Revisit the 12V Planning Section to fine-tune your layout.
🏷️ Step 3: Label Every Cable
Label 10 cm from the end using tape or permanent marker
Label both ends clearly (e.g.
Fridge +)Leave 10–15 cm slack at both ends
Important - Label where a cable is running from as well as where it’s running to. This saves huge amounts of time when you’re connecting the system later with walls up.